A Direct Connection is something that users in highly secured environments will want to use. This makes sure that none of the transferred data leaves the local network, enabling secure remote control of computers within the LAN.
Here’s how to set one up.
What’s a Direct Connection for Remote Access?
RealVNC uses its cloud service to discover two endpoints. Namely, one will be the computer you connect from and the other one – the one you’re connecting to.
Obviously, cloud connections have multiple advantages. They’re quick to set up, secured with 256-bit AES encryption, require no configuration, and are an easy way to get to the machine you need quickly.
However, there are environments where direct connections are the only option. This is because data is not supposed to go outside the network. The only condition is that you have an Enterprise subscription; you also need the network details for the machine you’re connecting to. It is also possible that some router or firewall configuration will be required.
When setting up a Direct Connection, you might encounter issues such as ‘connection refused’ when trying to access a VNC server using its IP address. To troubleshoot this, check your firewall settings and SELinux configurations to ensure they are not blocking the connection.
Setting Up a Direct Connection
Setting up a Direct Connection is a straightforward process that allows you to establish a secure and reliable connection to a remote computer without relying on cloud connections. To set up a Direct Connection, follow these steps:
Install and Configure: Ensure that both the VNC server and client are installed and configured on the respective computers. This is the foundation of your connection.
Obtain Local IP Address: Obtain the local IP address of the remote computer you want to connect to. You can find this by checking the network settings on the remote computer or by using the ipconfig command in the Command Prompt (Windows) or ifconfig command in the Terminal (Mac/Linux).
Enter IP Address: On the VNC client, enter the local IP address of the remote computer in the “Server” or “Host” field. This directs the client to the correct machine.
Allow Direct Connections: Ensure that the VNC server is configured to allow direct connections. This may involve enabling a specific setting or option in the VNC server software.
Connect: Establish the connection by clicking the “Connect” button on the VNC client. You should now be able to remotely control the computer.
By following these steps, you can set up a Direct Connection that keeps your data within your local network, ensuring security and reliability.
Preparing Your Network
Before setting up a Direct Connection, it’s essential to prepare your network to ensure a smooth and secure connection. Here are some steps to follow:
Same Local Network: Ensure that both computers are connected to the same local network (LAN). This is crucial for the Direct Connection to work.
Firewall Settings: Check the firewall settings on both computers to ensure that they are configured to allow VNC connections. You may need to create a new rule or exception to allow incoming connections on the VNC port (typically port 5900).
Router Configuration: If you’re using a router, ensure that it is configured to allow VNC connections. You may need to enable port forwarding or create a new rule to allow incoming connections on the VNC port.
Remote Access: Ensure that the remote computer is configured to allow remote access. This may involve enabling a specific setting or option in the operating system or VNC server software.
By preparing your network with these steps, you can ensure a secure and efficient Direct Connection setup.
Configuring the VNC Server and Client
Configuring the VNC server and client is crucial to establishing a secure and reliable connection. Here are some steps to follow:
VNC Server Configuration
Install and Configure: Install and configure the VNC server software on the remote computer.
Set a Strong Password: Set a strong password for the VNC server to ensure secure access.
Specify Port: Configure the VNC server to listen on a specific port (typically port 5900).
Enable Security Features: Enable encryption and authentication to ensure secure connections.
Additional Security: Set up any additional security features, such as access controls or logging.
VNC Client Configuration
Install and Configure: Install and configure the VNC client software on the local computer.
Connect Using IP Address: Set the VNC client to connect to the remote computer using the local IP address and port number.
Enable Security Features: Configure the VNC client to use encryption and authentication to ensure secure connections.
Additional Security: Set up any additional security features, such as access controls or logging.
Test the Connection: Test the connection to ensure that it is working correctly.
By following these steps, you can set up a secure and reliable Direct Connection to a remote computer using VNC. Remember to ensure that your network is prepared and that the VNC server and client are configured correctly to establish a successful connection.
Enabling Direct Connectivity on a Local Network
Provided all of the above is not an issue, enabling the feature is very simple. On the machine you want to control, open Options in the VNC Server. Then, under Connections, make sure you Allow direct VNC connections over TCP and UDP.
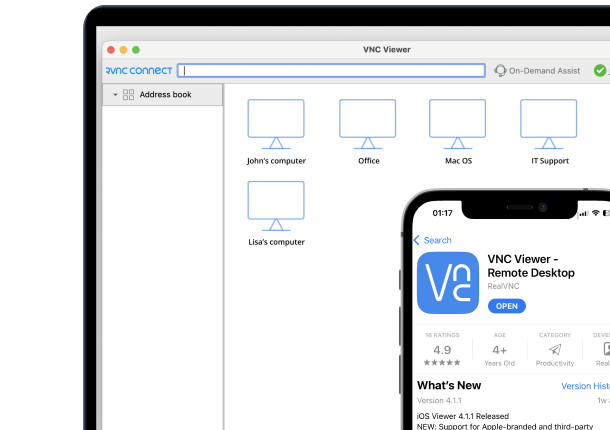
After that, go to the main VNC Server screen and then Other ways to connect. One of the things shown in there will be the IP address of that machine. Make note of that, as you will need it upon connecting.
Then, if you want to connect to that Server using RealVNC Viewer, just type that IP address in the search box at the top. Or you can use the hostname if you have it. Then hit Enter on your keyboard. You’ll see a confirmation screen, asking you for your credentials, depending on the type of authentication on the VNC Server. After that, you’ll be connected.
In short, in a highly secured environment, a direct connection is a way of not allowing data to leave your network.
Another great option to connect is Instant Support. Learn more about it and how to use RealVNC Connect’s essential features here.
And, if you haven’t already, make sure you take advantage of our 14-day free trial!